...
Setting up the VirtualBox network adapter
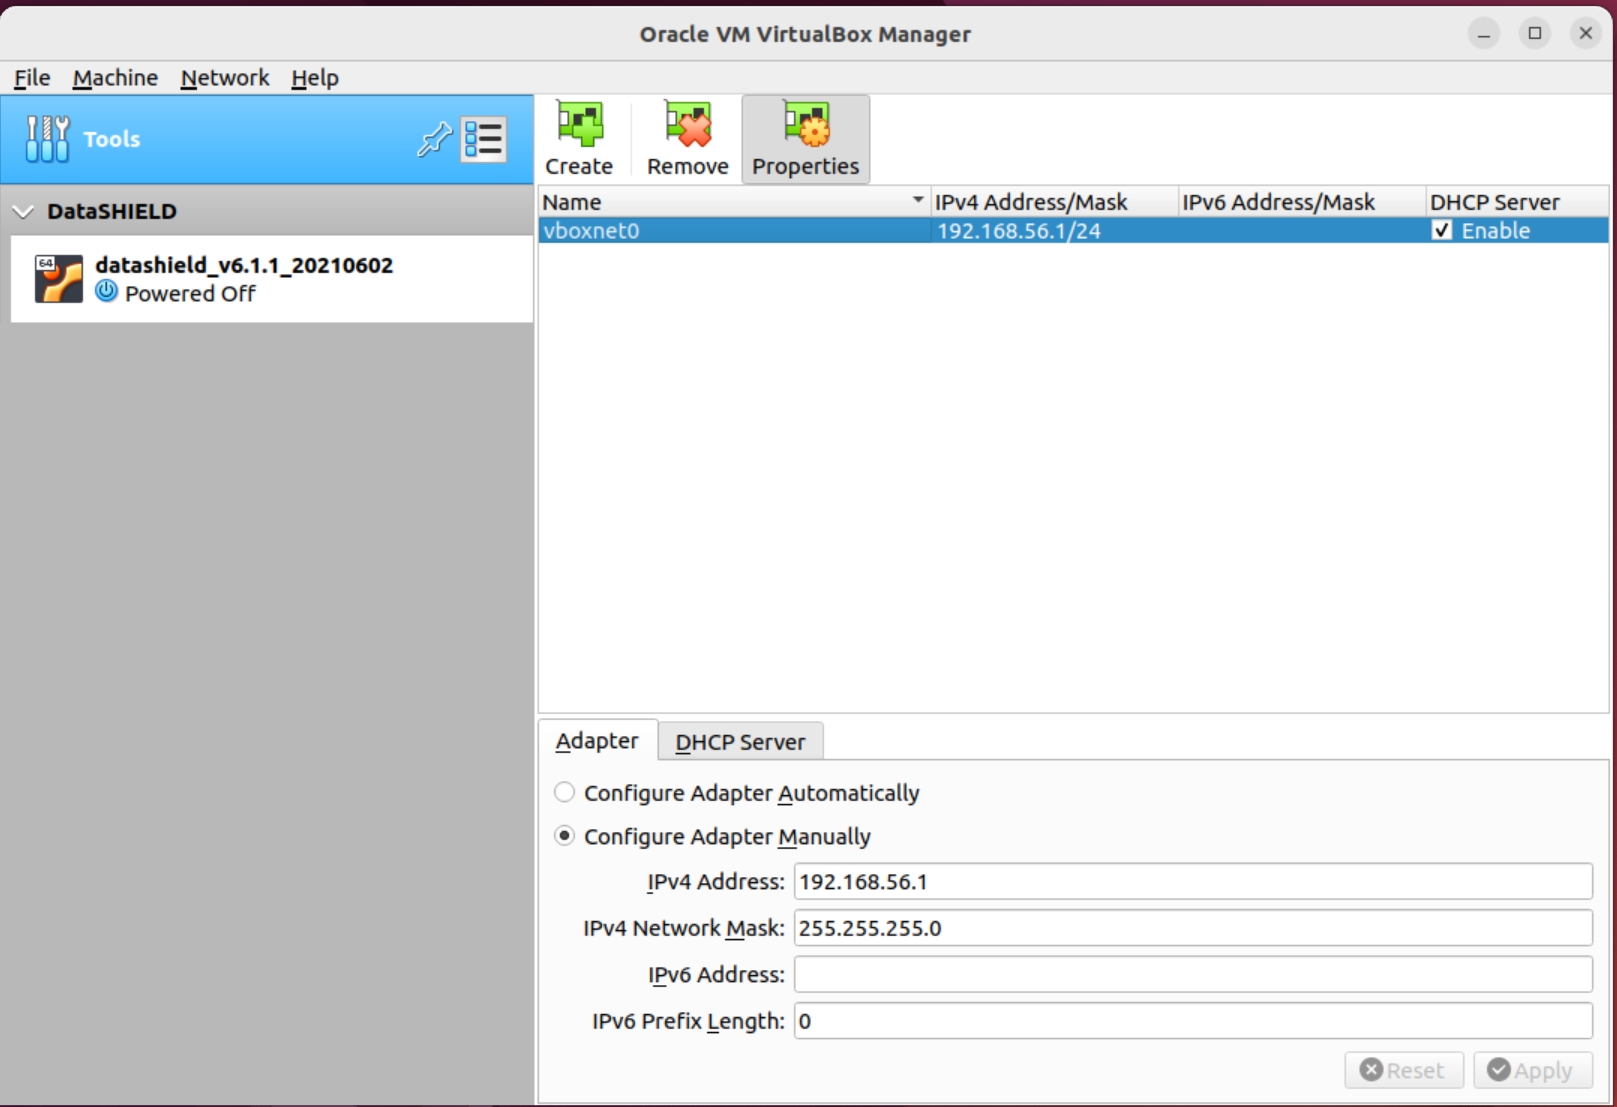
- On the VirtualBox "Tools" bar at the top of the list of Virtual Machines on the left hand side, right left click and select Host Network manager. A popup window should appear. Network and click Create
- Ensure the Adapter
tab at the bottom of the screen has the following settings:- Configure Adapter Manually options checked
- IPv4 address: 192.168.56.1
- IPv4 Network Mask: 255.255.255.0
- IPv6 Prefix Length: 0
- And ensure the DHCP Server tab at the bottom of the screen, next to Adapter;
- Has Enable Server unchecked.
- Click "Apply" to save any changed settings.
- You can now safely close this Host Network Manager popup window
- Now on each of your imported Virtual Machines, one at a time, right click the VM and click on "Settings" at the top of the right click menu (icon is orange in colour):
- Check that under the Network tab on the left hand side, the following options are set:
- Adapter 1: Attached to: NAT
- Adapter 2: Attached to: Host-only Adapter
- Name: 'vboxnet0'
- Check that under the Network tab on the left hand side, the following options are set:
...
| Warning |
|---|
On first launching the VMs (Virtual Opal Servers) you will observe several blue grey warning messages. These can be suppressed by clicking the "x" in the top right corner. This will trap your mouse- Clicking inside them can cause your mouse pointer to become captured within the mini-computer environment. The default key to escape this is Right-Ctrl |
...
| Tip |
|---|
You are now fully set up. To start using the DataSHIELD test environment, you can try our Tutorial for DataSHIELD users. The tutorial teaches you the basics of DataSHIELD including how to:
|
...