Instructions for Windows and Mac users
- Former user (Deleted)
- Alex Westerberg (Unlicensed)
- Former user (Deleted)
e
The minimum computer specification for installing the DataSHIELD training environment is:
- At least 4GB RAM. Each VM is allocated 2GB RAM
- Reasonably powerful processor (for example: Intel i5 or i7).
- 4GB space on the hard drive
- Administrator rights on the computer. If you do not have administrator rights to install software on your computer contact your IT support to get the following installed on your machine.
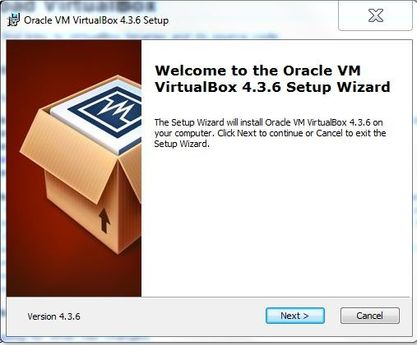
Download and install VirtualBox
- Download VirtualBox from here
- Double click on the downloaded executable file and click
NextandYesto install the default settings.
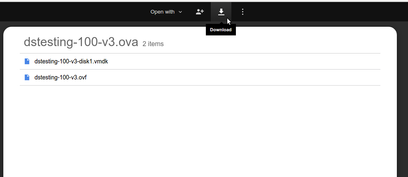
Download and install the training Opal servers
Download the Opal servers (synthetic data are included)
These Opal servers are 1-2 Gb in size and may take some time to download.
- Right click and open each of the Opal training servers in a new window.
- Select the
downloadbutton and clickdownload anyway.
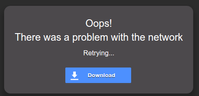
You may see a network error warning, this is because the file is too big to preview in Google Drive. To continue, press the
download
button.
Import the training Opal servers into VirtualBox
- To install each training Opal servers select
Filefrom the top menu and thenImport Appliance..., browse to each training Opal server file and install. - When you are finished, the VirtualBox main interface should show the two Opal servers (Note: The version 'v2' may be different).
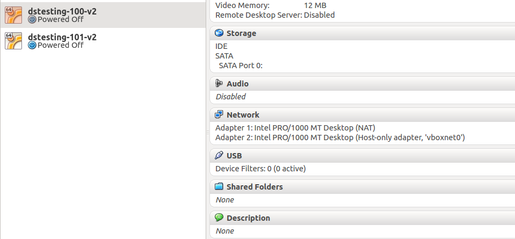
Configure the network
Importing the Opal servers should create the correct settings, however please check your settings match those below.
Setting up the VirtualBox network adapter
- On the VirtualBox top menu go to the tab
Fileand selectPreferences..., this opens up a VirtualBox settings window. - Inside that window and under the tab
Host-only Networksclick onNetworkand then click on the screw driver icon on the right which saysEdit host-only network (Space)when you hover on it.
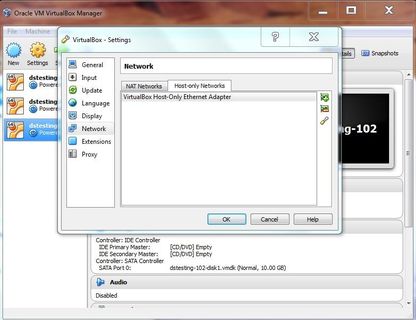
- Under the
Adaptertab set:
IPv4 address: 192.168.56.1
IPv4 Network Mask: 255.255.255.0
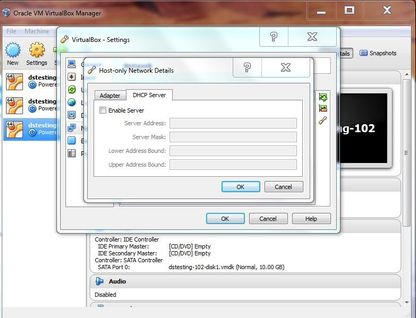
- Under
DHCP Servertab make sure thatEnable serveris unchecked. SelectOKto save the settings.
Starting the Opal Servers
Snapshot the Opal Servers
Why take snapshots?
Using the current version of Virtual Box and the current version of Opal, we have found that on some platforms if you close down and power off the VM server in the usual way (by right clicking on the server and following the instructions, or by using the Machine menu) Opal halts incorrectly and prevents the VM from booting up correctly the next time. It is essential to take a snapshot of the pristine server when it is first imported (before you first start it up). Then you can always use that snapshot to start the VM correctly (with Opal working).
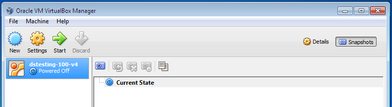
- Before starting the Opal servers it is very useful to take a snapshot of each Opal server. This enables you to roll-back the Opal servers to a pristine state, without needing to delete them and repeat the process above to re-import them. To take a snapshot:
- first open VirtualBox and click on a server.
- Click the button in the top right that says
Snapshots
- Take a snapshot of the server by clicking the leftmost camera icon:
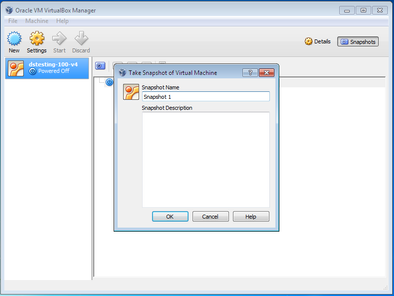
- Repeat for each Opal server.
You can customise the names of snapshots and take as many as you like to save different states of the Opal server. For example, you could take Snapshot 1 straight after importing the Opal server, and then later Snapshot 2 after uploading some of your own simulated data.
Start the Opal Servers
To start an Opal server just open VirtualBox click on a server and click on the green arrow that says
Start
(or just double click on the Opal server name).
Depending on how powerful your computer is, the Opal servers may take a few minutes to boot and for Opal to start.
- If you are presented with more than one Operating System in the black 'Oracle VM VirtualBox' window select the first option by pressing
enteron your keyboard.
The Opal web interface
- Check whether Opal has been started by going to the Opal web interface by opening a web browser and typing the ip address of the VM, followed by the port number.
For example: to access the web interface for dstesting-100 and dstesting-101, go to:
http://192.168.56.100:8080
http://192.168.56.101:8080
Because these VMs are internal to your computer, there is no need for encryption so port :8080 is safe, in addition you should be able to login to the local servers even if you have no internet access.
Trouble logging into Opal web interface
Try using port 8443 > https:/192.168.56.100:8443 and https:/192.168.56.101:8443 .You will get a warning when connecting to 8443 because the SSL certificate is self-signed.
Opal is running and ready if the opal login screens is available. You do not need to login; just check that a login webpage is available.
If at this point your Opal server(s) are not working, right click on an Opal server name and select
Settings
. Select
System
and enable
I/O APIC
and disable
Hardware Clock in UTC time
. Restart the Opal servers
- Should you require logging into the Opal web interface e.g. to upload your own data etc:
username: administrator
password: datashield_test&
Install DataSHIELD client packages
Install R and Rstudio
- Download and install R.

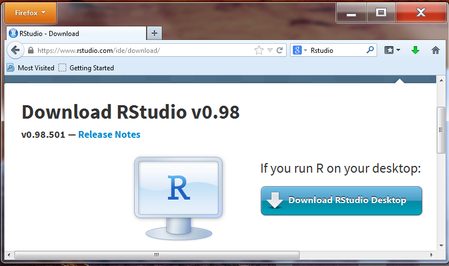
- Download and install Rstudio Desktop Open Source edition.
Install the DataSHIELD client package (in R or R Studio)
- Install DataSHIELD dependencies
install.packages('RCurl', dependencies = TRUE)
install.packages('rjson', dependencies = TRUE)
install.packages('fields', dependencies = TRUE)
- Install the
opalanddatashieldclientR packages by typing into R:
install.packages('opal', repos='http://cran.obiba.org', type='source')
install.packages('datashieldclient', repos='http://cran.obiba.org', type='source')
If you get the message
ERROR: dependencies ... are not available for package 'xxxxxxxxxxxxxx'
you will need to install the packages (
opal
,
dsBaseClient
, dsModellingClient
,
dsGraphicsClient
,
dsStatsClient
) one at a time e.g.
install.packages('opal', repos='http://cran.obiba.org', type='source')
install.packages('dsBaseClient', repos='http://cran.obiba.org', type='source')
install.packages('dsModellingClient', repos='http://cran.obiba.org', type='source')
install.packages('dsGraphicsClient', repos='http://cran.obiba.org', type='source')
install.packages('dsStatsClient', repos='http://cran.obiba.org', type='source')
DataSHIELD client manuals
Update the DataSHIELD server side packages
- Follow the instructions - Update the training Opal environment
- Once you have updated each Opal server, follow the instructions to shut down each server whist retaining the changes - Shutdown if changes are made to Opal servers
- Take another snapshot of each VM.
Shutting down the Opal Servers
If no changes to Opal servers (e.g. for general users)
When you have finished your analysis, to shutdown the Opal server:
- click the cross at the top right of the window. This will give you a list of options for how to shutdown the machine:
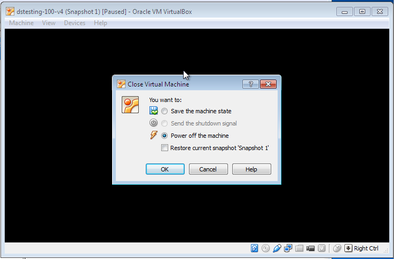
- select
Power off the machineand check the box markedRestore current snapshot.
This will revert the Opal server to the state it was in when the snapshot was taken.
Any changes you have made since this point, such as uploading data or updating server-side packages will be lost.
If you wish to preserve changes made to the Opal training server follow Instructions if changes are made to Opal servers below.
If changes are made to Opal servers (e.g. for developers)
To shutdown the Opal server without losing any changes you have made to uploaded data or server-side DataSHIELD packages:
- from the Opal training server command line log into the Opal using:
Username: user
password: password
- type the shutdown signal into the command line:
sudo poweroff
- Once the Opal training server has shutdown take a snapshot in order to preserve the changes made to the VM
- Repeat for each Opal server
Further instructions are available for the advanced uses of the DataSHIELD training environment:
You are now fully set up. To start using the DataSHIELD training environment sit our v4 Tutorial for DataSHIELD users. The tutorial teaches you the basics of DataSHIELD including how to:
- login
- run commands to:
- generate descriptive statistics
- subset tables and vectors
- fit some regression models

DataSHIELD Wiki by DataSHIELD is licensed under a Creative Commons Attribution-ShareAlike 4.0 International License. Based on a work at http://www.datashield.ac.uk/wiki