Help
DataSHIELD support is freely available in the DataSHIELD forum by the DataSHIELD community. Please use this as the first port of call for any problems you may be having, it is monitored closely for new threads.
The minimum computer specification for installing the DataSHIELD training environment is:
Ideally 12GB+ of RAM. Each VM is allocated 4GB RAM, and some needs to be spare for other applications.
Reasonably powerful processor (for example: Intel i5 or i7).
16GB space on the hard disk.
7GB per VM + VirtualBox installation requirement (215 MB)
Administrator rights on the computer. If you do not have administrator rights to install software on your computer contact your IT support to get the following installed on your machine.
Download and install VirtualBox
Download VirtualBox from here. Use the OS X hosts version.
Double click on OS X hosts version. Allow the download, if prompted.
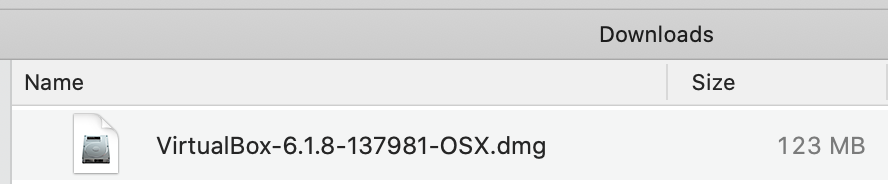
A dmg file referred as VirtualBox and the version can be found in Downloads (see example below for version 6.1.8). Double-click on the file to install VirtualBox.
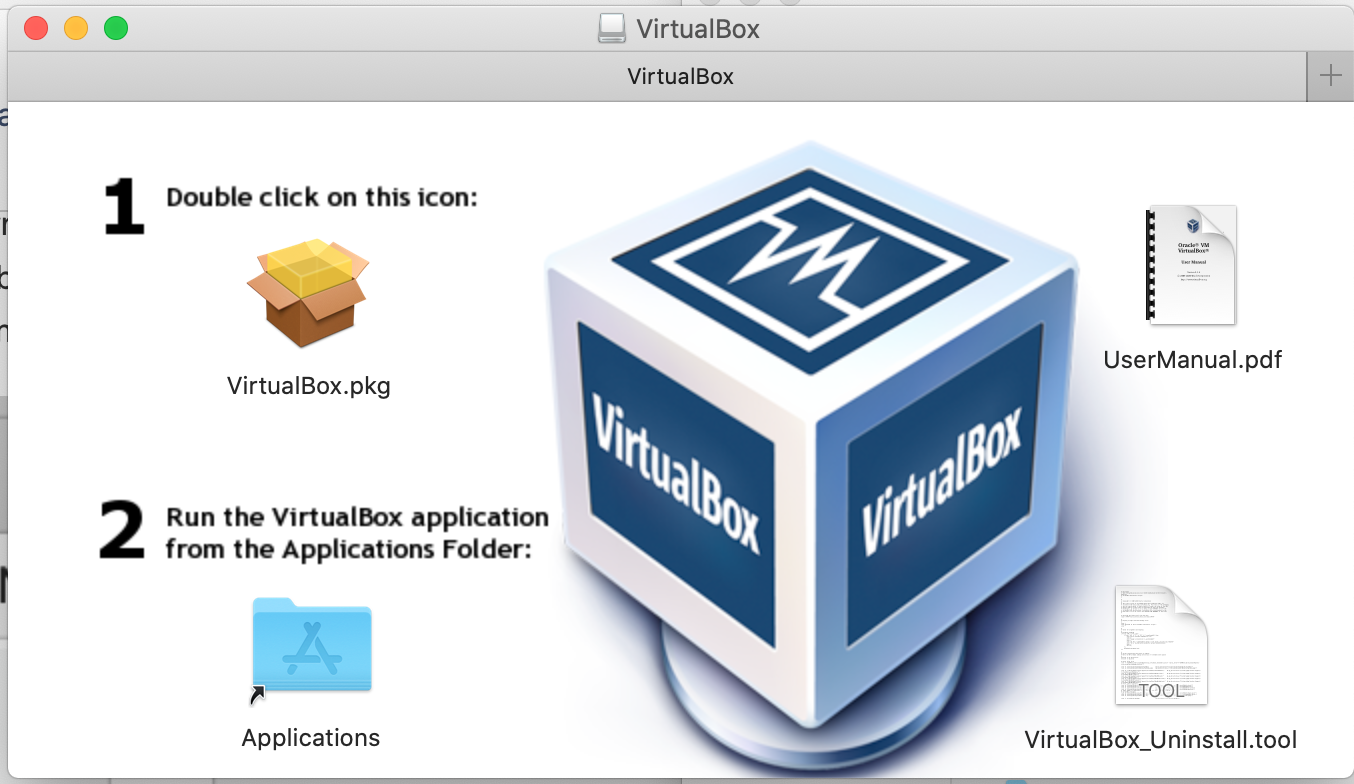
A verifying process may occur before this screen is shown. Follow the two steps stated in the install program.
Download and install the Opal tutorial servers
Download the Opal servers (synthetic data are included)
These Opal servers are 1-2 GB in size and may take some time to download.
Right click and open each of the Opal tutorial servers in a new window.
Select the download
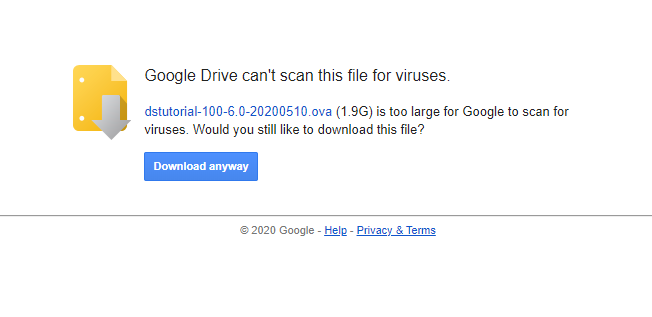
You may see a network error warning, this is because the file is too big to preview in Google Drive. To continue, press the
download
button.
Import the Opal tutorial servers into VirtualBox
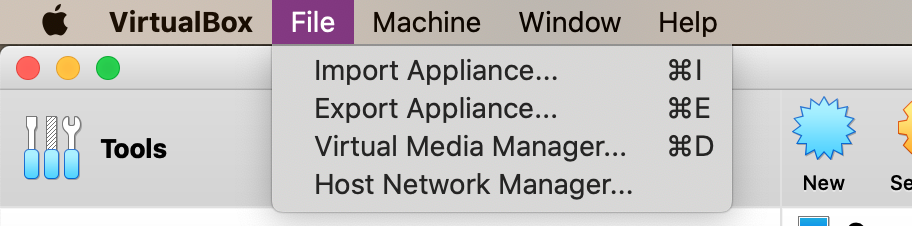
To install each Opal tutorial server, select
FileImport Appliance...
When you are finished, the VirtualBox main interface should show the two Opal servers.
Configure the network
Importing the Opal servers should create the correct settings, however please check your settings match those below.
Setting up the VirtualBox network adapter
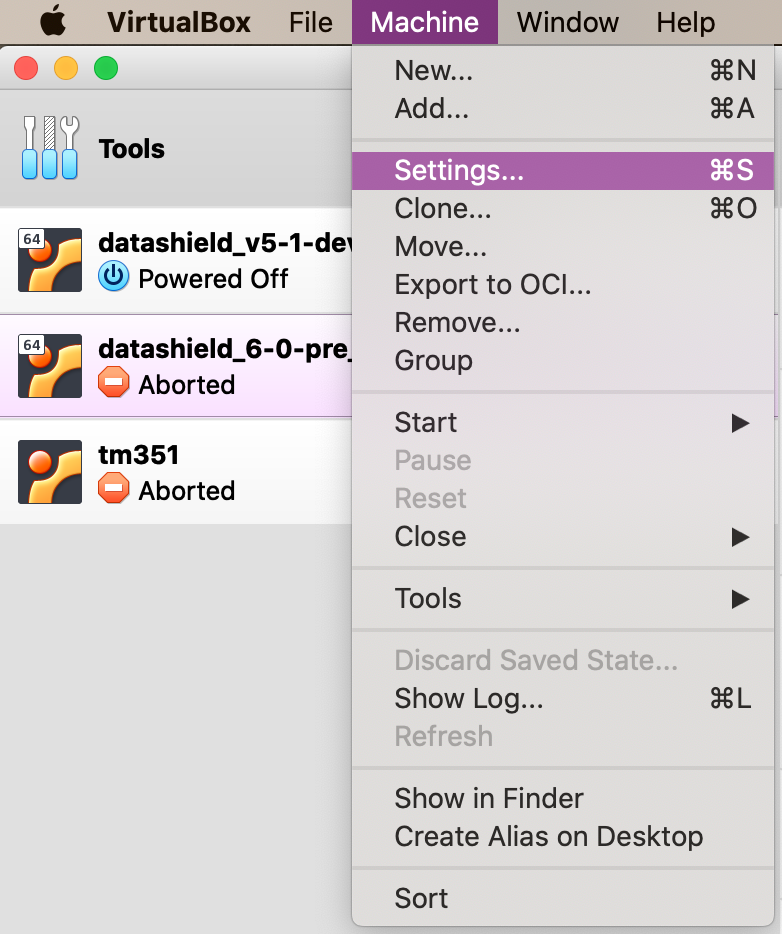
Select one of the Virtual Machines (VMs) and click on the orange cog settings on the top bar, right hand portion of the screen.

You can also click on the Machine menu and the Settings option.
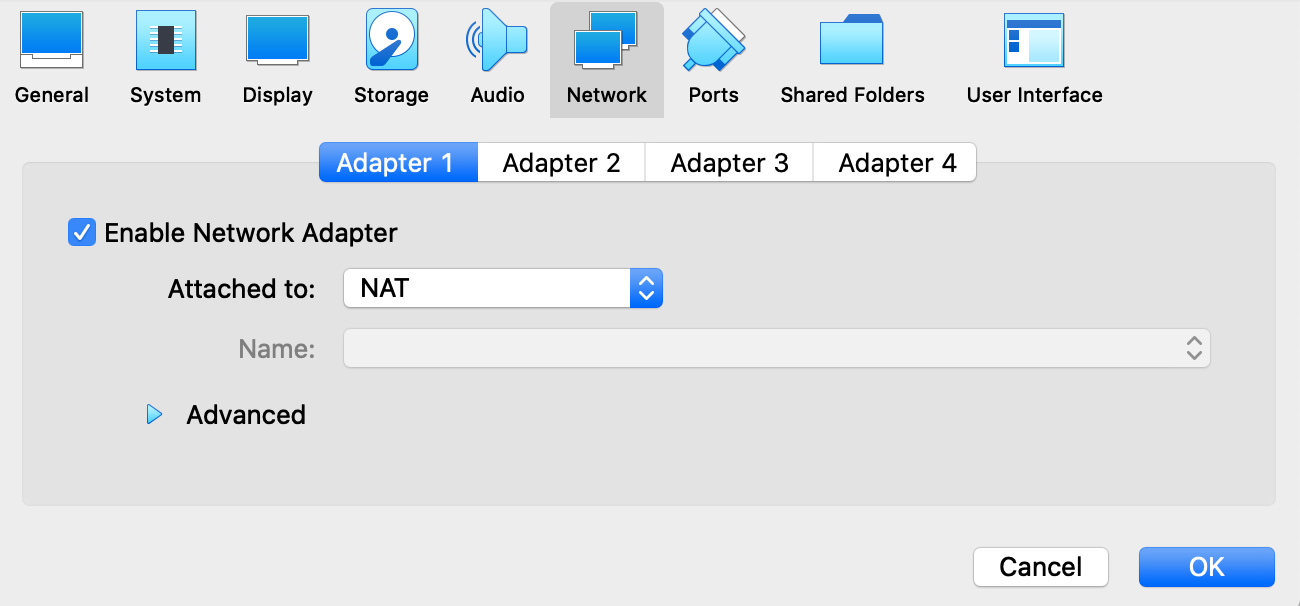
Inside that window and under the tab Network, ensure that
Under Adapter 1, Enable Network Adapter is checked and it is Attached to: NAT.
Under Adapter 2, Enable Network Adapter is checked and it is Attached to: Host-only Adapter.
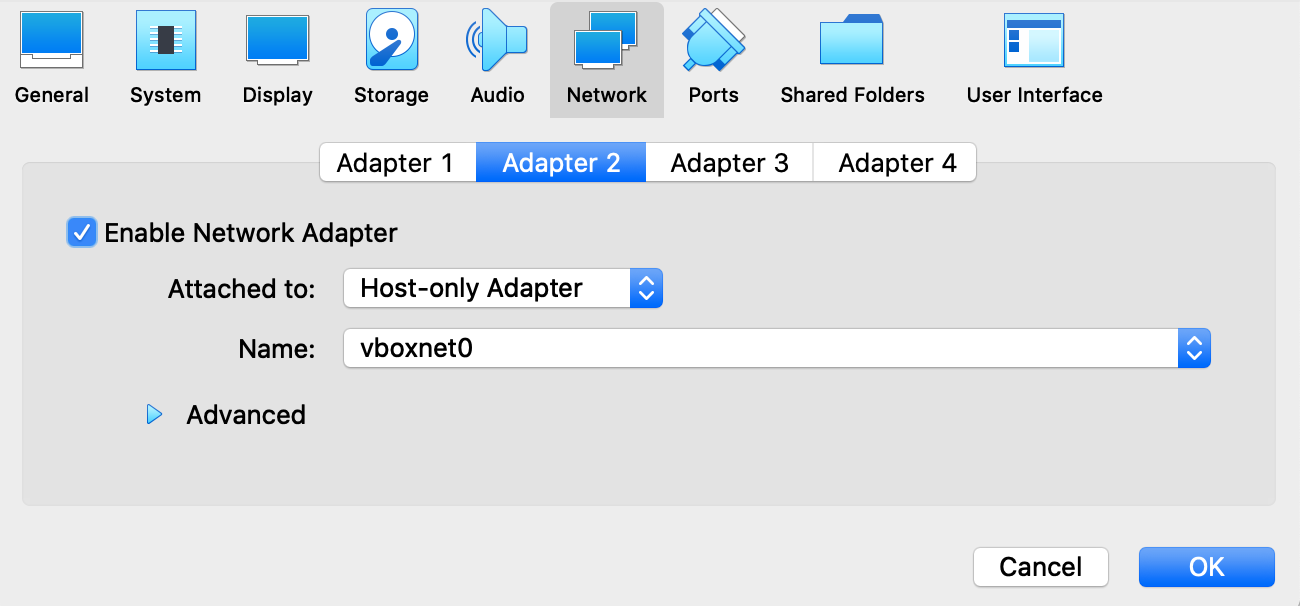
Repeat this for the other VM by first selecting it on the list.
Next we need to ensure DHCP server is not enabled.
Click on Tools, and a new window will pop up.

In the window, click on the create icon.
Ensure Configure Adapter Manually is checked for vboxnet0
IPv4 address: 192.168.56.1
IPv4 Network Mask: 255.255.255.0
Ensure Configure Adapter Manually is checked for vboxnet1
IPv4 address: 192.168.57.1
IPv4 Network Mask: 255.255.255.0
At the end of this process there should be two items with the name "vboxnet0" and "vboxnet1".

Starting the Opal Servers
Start the Opal Servers
To start an Opal server, open VirtualBox ,click on a server and click on the green arrow that says
Start
(or just double click on the Opal server name). Click on Normal Start. If your security settings is preventing it starting the virtual machine, then click on Headless Start.

Depending on how powerful your computer is, the Opal servers may take a few minutes to boot and for Opal to start. Also
If you are presented with more than one Operating System in the black 'Oracle VM VirtualBox' window select the first option by pressing
enter
on your keyboard.
Be aware, once the VM windows have started, clicking inside them can cause your mouse pointer to become captured. The default key to escape this is Right-Ctrl
The Opal web interface
This is a simple check to tell if the VMs have started.
By going to the Opal web interface by opening a web browser and typing the IP address of each:
http://192.168.56.100:8080
http://192.168.56.101:8080
Because these VMs are internal to your computer, there is no need for encryption, so port :8080 is safe. In addition you should be able to login to the local servers even if you have no internet access.
Trouble logging into Opal web interface
Try using port 8443 > https://192.168.56.100:8443 and https://192.168.56.101:8443 .You will get a warning when connecting to 8443 because the SSL certificate is self-signed.
Opal is running and ready if the opal login screen is available. You do not need to login; just check that a login webpage is available.
If at this point your Opal server(s) are not working, right click on an Opal server name and select
Settings
. Select
System
and enable
I/O APIC
and disable
Hardware Clock in UTC time
. Restart the Opal servers
Should you require logging into the Opal web interface e.g. to upload your own data etc:
Opal web interface login details
username: administrator
password: datashield_test&
Install DataSHIELD client packages
Install R and Rstudio
Download and install R.
Download and install RStudio Desktop Open Source edition.
Install the DataSHIELD client package (in R or R Studio)
Install DataSHIELD dependencies:
install.packages('DSI')
install.packages('DSOpal')
install.packages('DSLite')

install.packages(c('fields', 'metafor', 'ggplot2', 'gridExtra', 'data.table'))
Install the dsBaseClient R packages by typing into R:
install.packages('dsBaseClient', repos='http://cran.obiba.org', type='source')
DataSHIELD client manuals
See: Current release
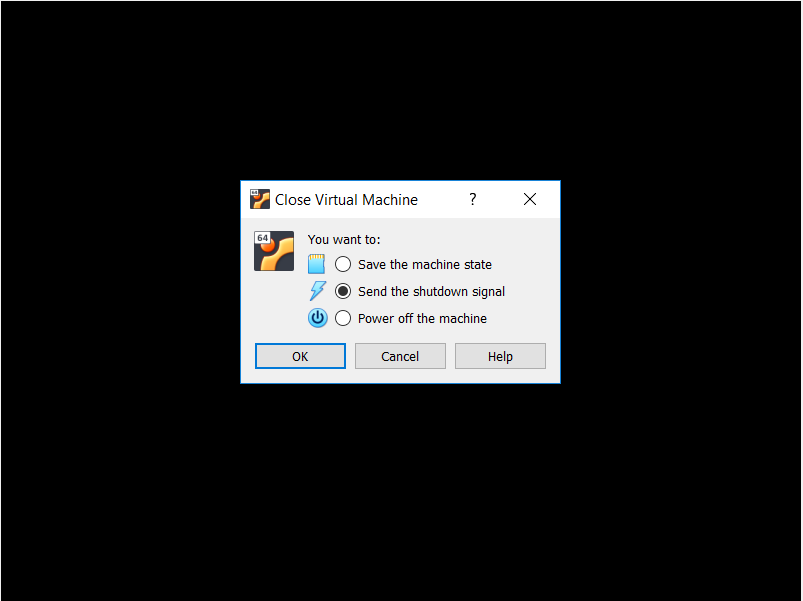
Shutting down the Opal Servers
When you have finished your analysis, to shutdown the Opal server:
click the cross at the top right of the window. This will give you a list of options for how to shutdown the machine:
Select Send the shutdown signal.
Keeping up to date
Please see our keeping up to date wiki page in the user/analyst support section.
You are now fully set up. To start using the DataSHIELD training environment, you can try our Tutorial for DataSHIELD users. The tutorial teaches you the basics of DataSHIELD including how to:
login
run commands to:
generate descriptive statistics
subset tables and vectors
fit some regression models
Further instructions are available for the advanced users of the DataSHIELD training environment:
Follow the instructions in the Opal management tutorial to learn how to upload your own data.
DataSHIELD R package manuals will be available soon on the release notes page.
Install non-CRAN R packages to the training Opal servers (coming soon).
If you are experiencing some of the images in this page not loading, you may need to do a page refresh. It is likely due to confluence (the wiki hosting cloud service) not managing HD images very well.
